

Setting Up an SSTP VPN Server on a MikroTik Router and Configuring Windows Clients
This tutorial covers step-by-step instructions to set up an SSTP (Secure Socket Tunneling Protocol) VPN server on a MikroTik router, including generating and exporting SSL certificates, and configuring a Windows client.
Step 1: Generate SSL Certificates
Generate a Certificate Authority (CA)
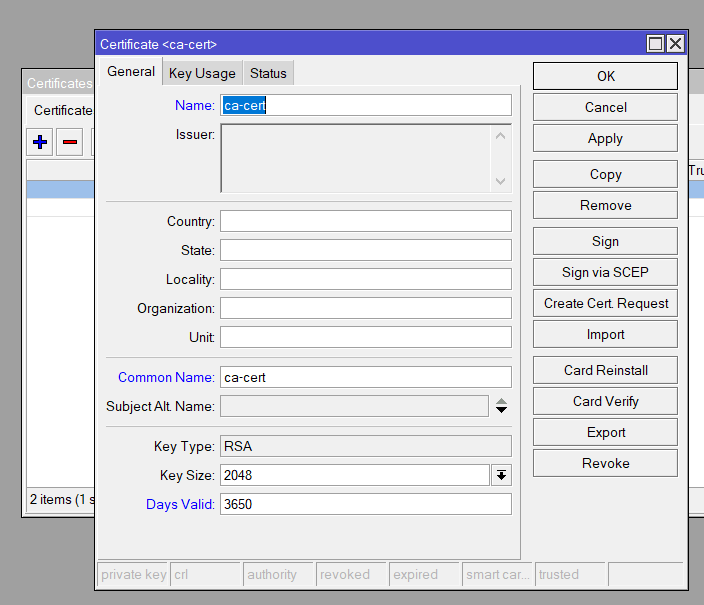
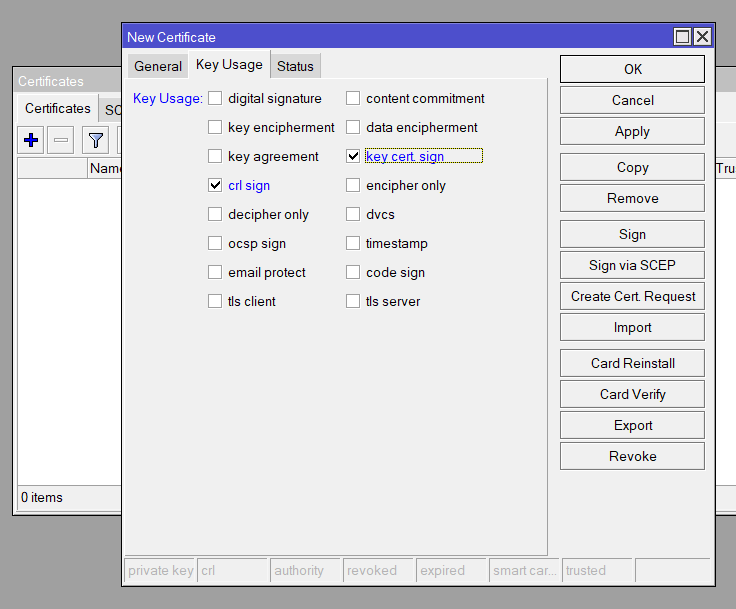
/certificate add name=ca-cert common-name=ca-cert key-usage=key-cert-sign,crl-sign days-valid=3650 Generate a Server Certificate
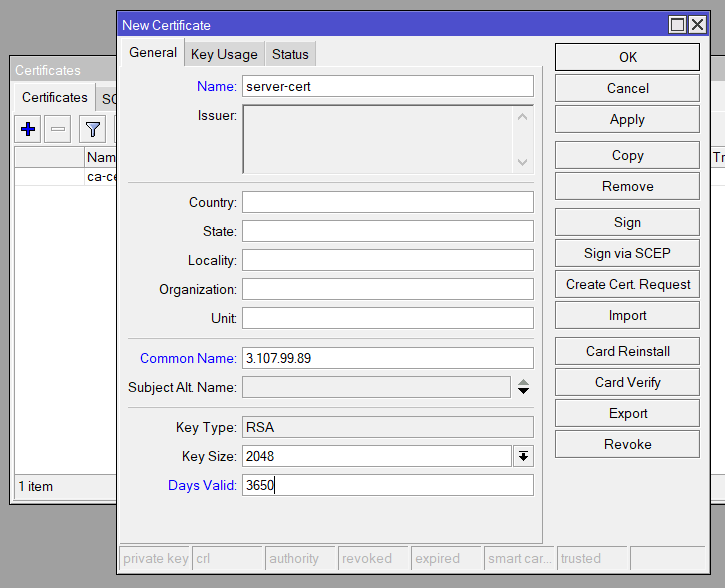
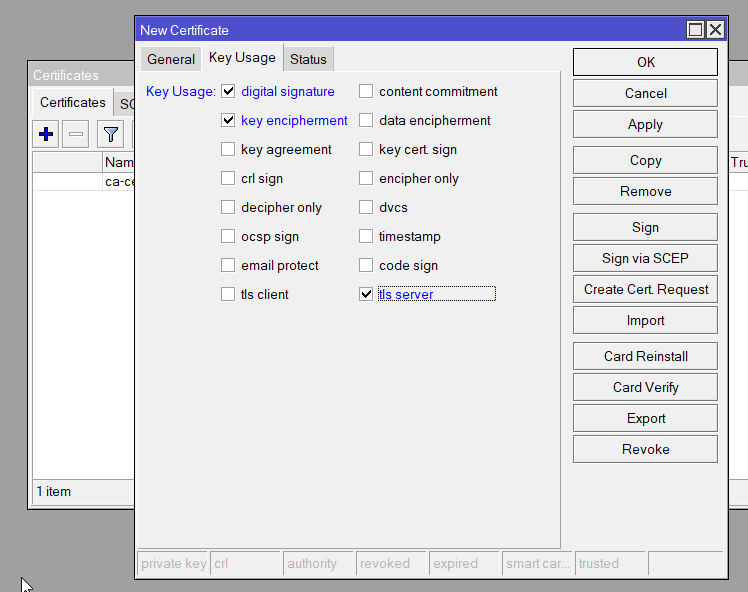
/certificate add name=server-cert common-name=<your-domain-or-ip> key-usage=digital-signature,key-encipherment,tls-server days-valid=3650Sign the Certificates
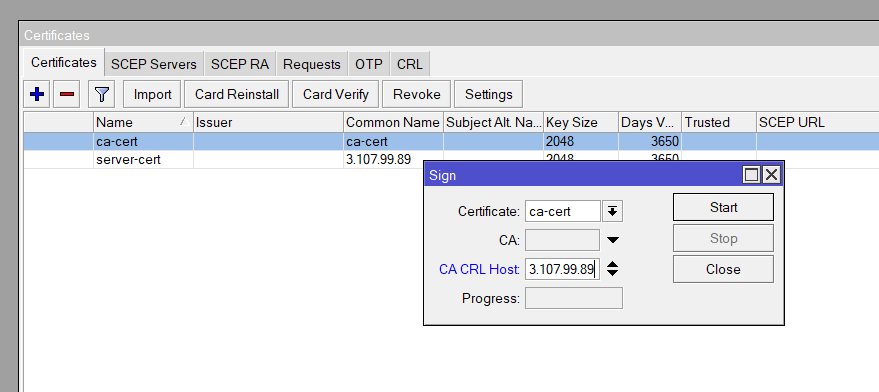
/certificate sign ca-cert ca-crl-host=<your-domain-or-ip>
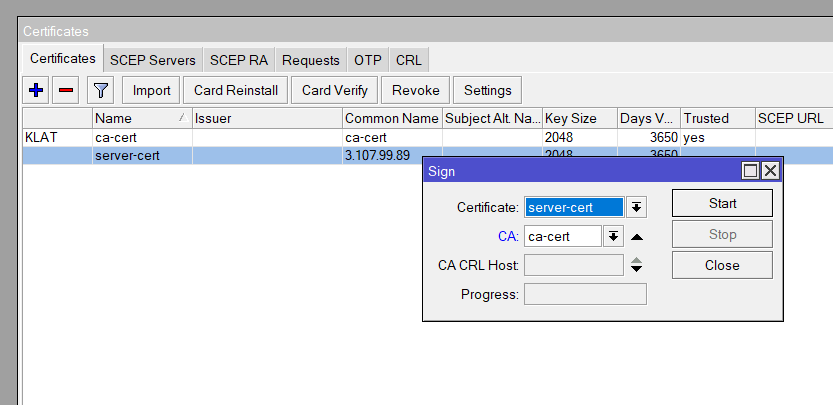
/certificate sign server-cert ca=ca-certExport the CA Certificate
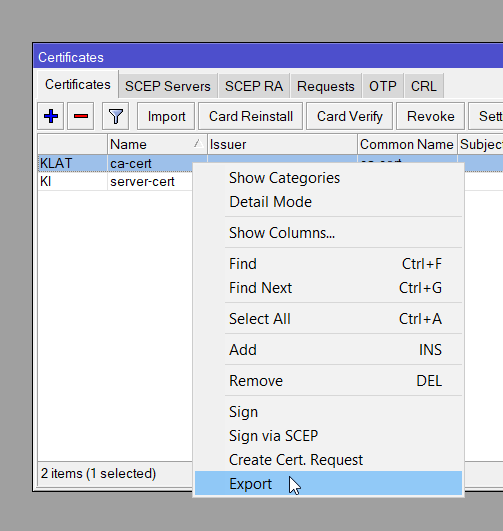
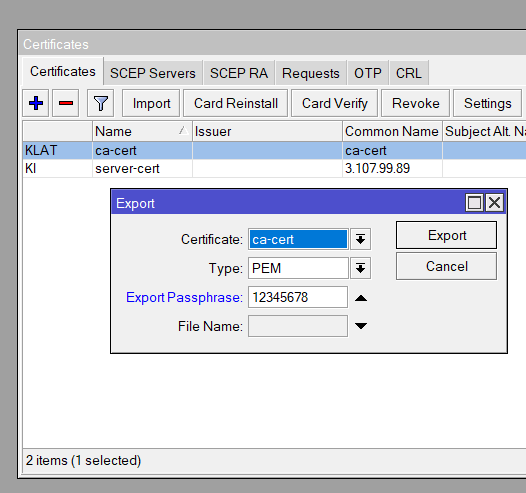
/certificate export-certificate ca-cert export-passphrase="yourpassword"This exports the CA certificate to /files on the MikroTik router.
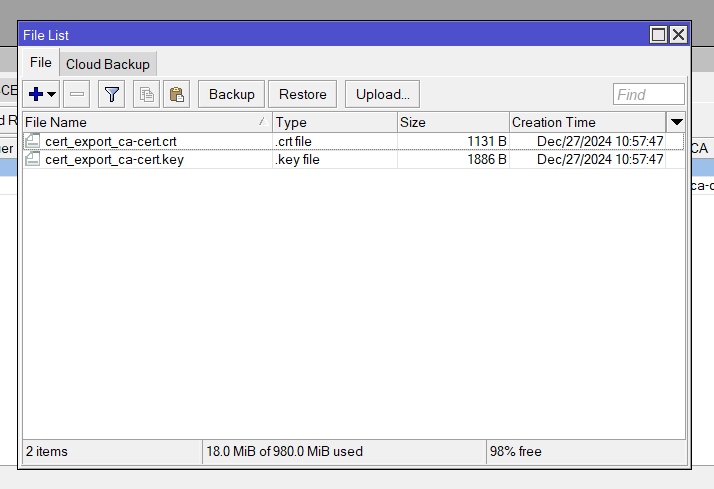
Download the CA Certificate Open WinBox, navigate to “Files,” and download the .crt and .key files to your local machine.
Step 2: Configure the SSTP Server
Enable SSTP Server
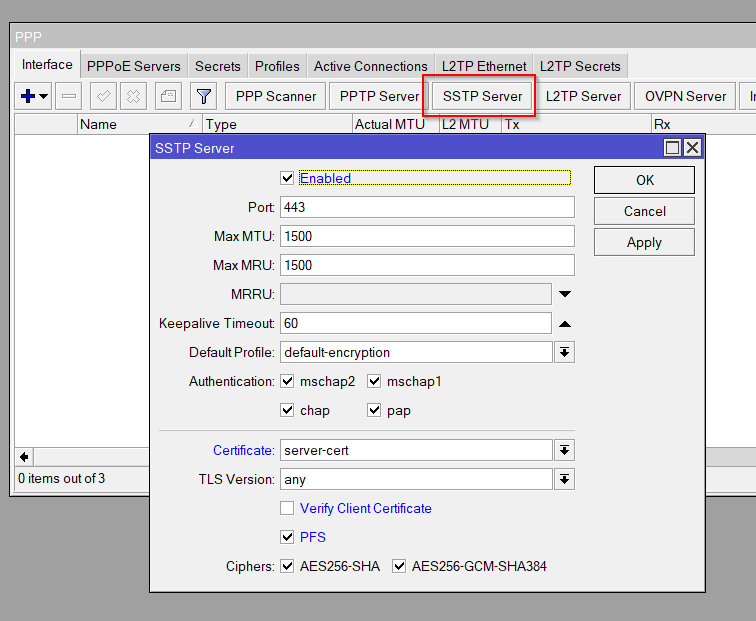
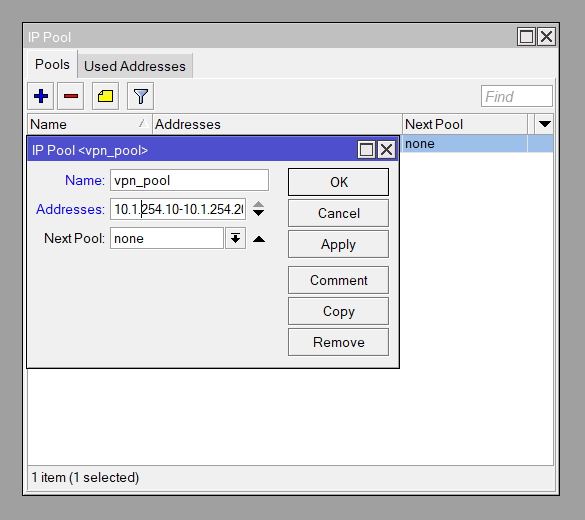
/interface sstp-server server set enabled=yes certificate=server-cert default-profile=default-encryption authentication=mschap2 pfs=yesConfigure IP Pool for SSTP Clients
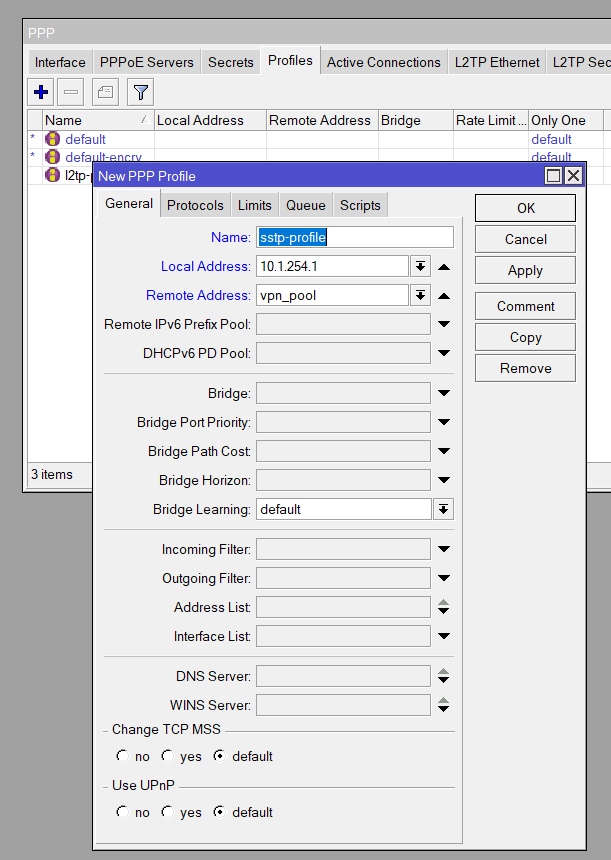
/ip pool add name=vpn_pool ranges=10.1.254.10-10.1.254.200Create a PPP Profile for SSTP
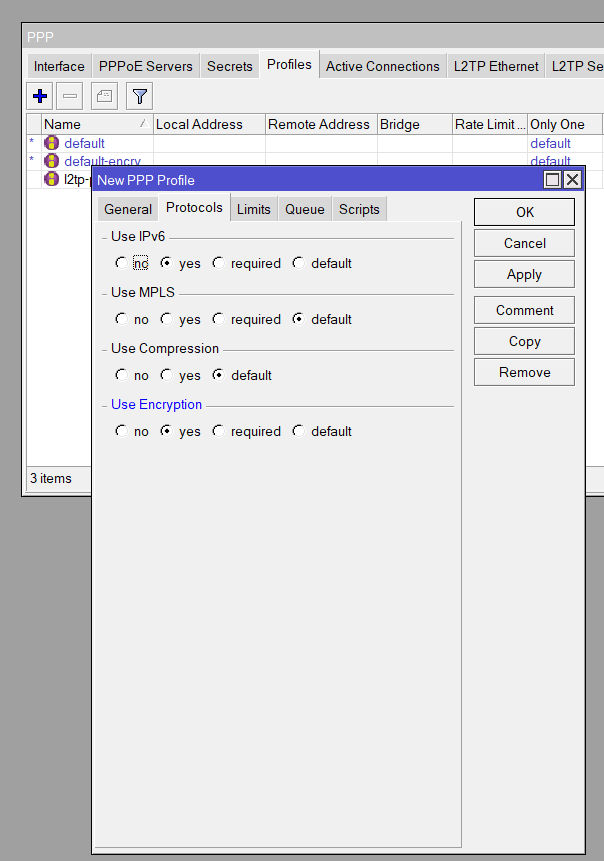
/ppp profile add name=sstp-profile local-address=10.1.254.1 remote-address=vpn_pool use-encryption=yesAdd SSTP Users
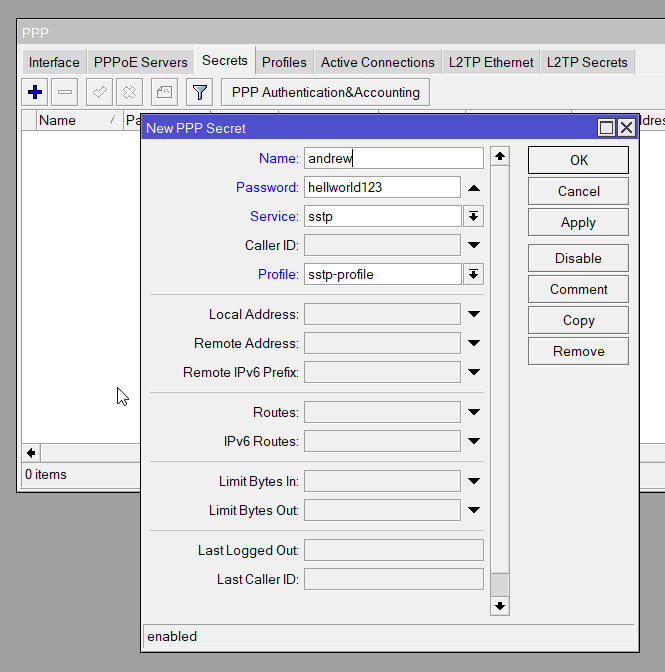
/ppp secret add name=andrew password=helloworld123 service=sstp profile=sstp-profileSet Firewall Rules (Optional: If MikroTik is directly internet facing and without another firewall/filter device). Add rules to allow SSTP traffic (port 443):
/ip firewall filter add chain=input protocol=tcp dst-port=443 action=acceptStep 3: Configure Windows Client
Import the CA Certificate
- Double-click the downloaded
.crtfile on the Windows machine. - Click “Install Certificate.”
- Select “Local Machine” and proceed.
- Choose “Place all certificates in the following store” and select “Trusted Root Certification Authorities.”
- Complete the wizard.
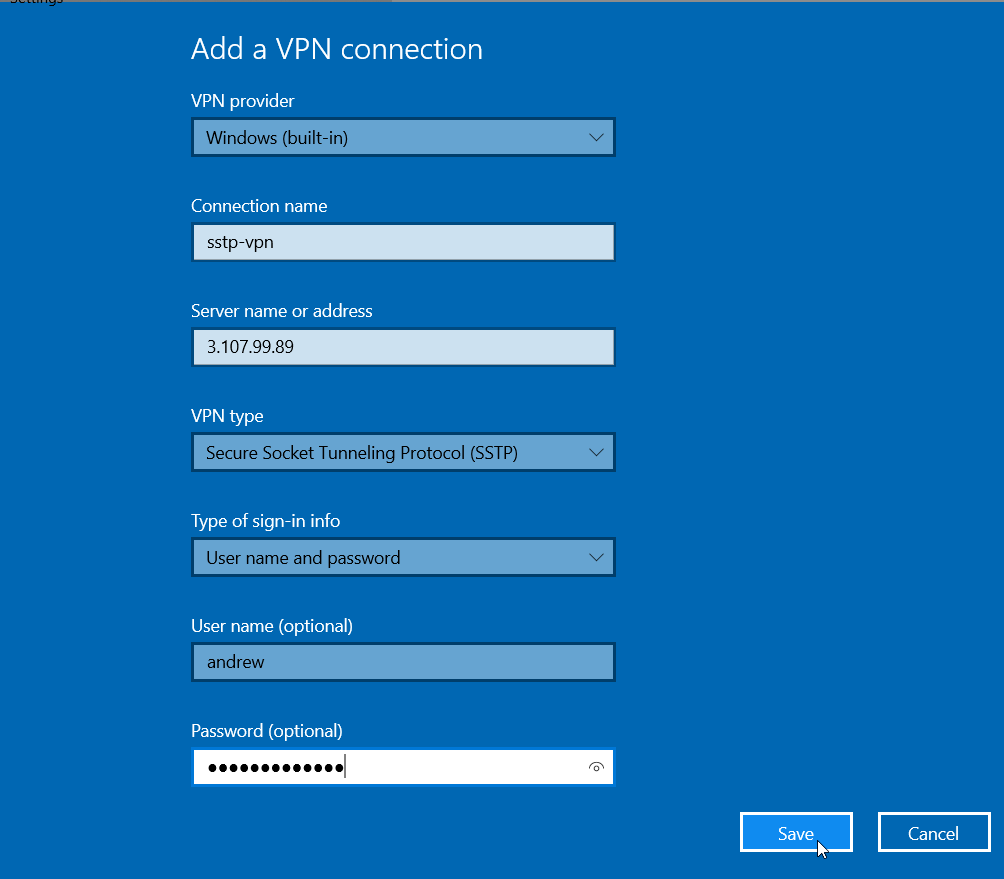
Create a New VPN Connection
- Open “Network and Sharing Center” > “Set up a new connection or network.”
- Choose “Connect to a workplace” > “Use my Internet connection (VPN).”
- Enter your MikroTik router’s public IP or domain name in “Internet Address.”
- Provide a name for the connection, e.g., “MikroTik SSTP VPN.”
- Click “Next.”
Configure VPN Properties
- Open the “Network” adapter settings.
- Right-click the new VPN connection > “Properties.”
- Go to the “Security” tab.
- Set “VPN type” to “Secure Socket Tunneling Protocol (SSTP).”
- Ensure “Microsoft CHAP Version 2 (MS-CHAP v2)” is checked.
Connect to the VPN
- Click the network icon in the taskbar.
- Select the VPN connection and click “Connect.”
- Enter the username and password created on the MikroTik router.
Step 4: Verify the Connection
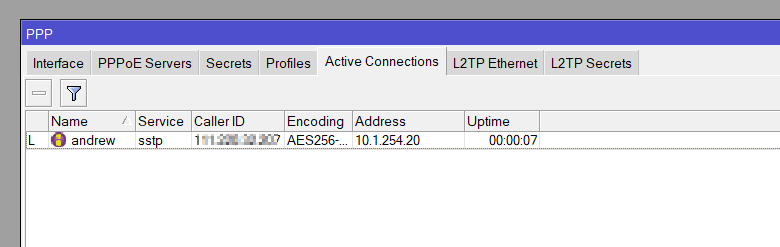
Check MikroTik Active Connections – Ensure the client is listed as connected.
/interface sstp-server monitor 0
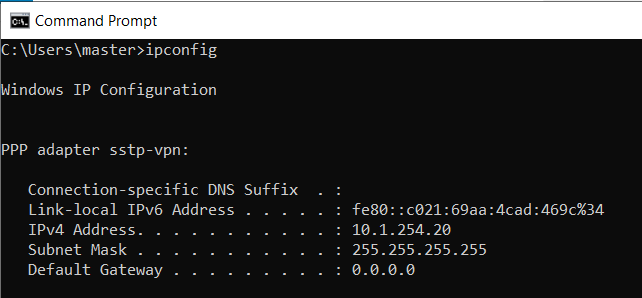
Verify IP Configuration on Windows Run ipconfig in the command prompt and confirm the assigned IP address matches the SSTP pool.
Confirm Public IP matches that of the remote MikroTik

Optional Enhancements
- Dynamic DNS: Use MikroTik’s dynamic DNS to avoid relying on a static IP.
- Certificate Validity: Renew certificates before they expire using the same steps.
By following these steps, you’ll have a secure SSTP server on your MikroTik router and Windows clients configured to connect seamlessly.


Great explaination , but why you don’t create client certificate?
Hi Aymen,
The certificate is used to valid the server, much like an SSL cert for a website, where there is a certificate on the server to confirm that the hostname that resolves to the IP is genuine. For this to happen the SSL needs to be validated or signed by a CA. As we are generating the cert on the MikroTik we have to create the CA and it’s that that needs to be installed on the client so the SSL cert for the server can be trusted.
I have made a guide in the same way but using Let’s Encrypt as the SSL cert to use so there’s no need to create or install an additional CA cert as the SSL cert is already valid. This makes client setup much simpler.
I plan to make a video explaining this and showing that guide in the next few days however here is the guide for now:
https://mikrotikmasters.com/sstp-vpn-server-on-a-mikrotik-router-using-lets-encrpyt-ssl-cert/
Let me know what you think.