What is an SSL Certificate?
An SSL (Secure Sockets Layer) certificate is a digital certificate that establishes a secure, encrypted connection between a user’s web browser and a website’s server. It ensures that any data exchanged between the two is protected from being intercepted or altered by unauthorized parties. This is especially important for websites that handle sensitive information, such as passwords, credit card details, or personal data.
When a website has an SSL certificate, its URL begins with “https://” instead of “http://,” and users see a padlock icon in the browser’s address bar. SSL certificates provide three key benefits:
- Encryption: Protects data in transit from being read by third parties.
- Authentication: Confirms that the website is owned by a legitimate organization or entity.
- Trust: Builds user confidence by showing the website is secure.
What is Let’s Encrypt?
Let’s Encrypt is a free, automated, and open certificate authority (CA) that provides SSL certificates to website owners. Launched in 2016, its mission is to make the web more secure by making SSL/TLS encryption accessible to everyone. Key features of Let’s Encrypt include:
- Free SSL Certificates: Unlike many traditional certificate authorities, Let’s Encrypt provides SSL certificates at no cost.
- Automation: Let’s Encrypt simplifies the process of obtaining, renewing, and managing certificates through automation tools like Certbot.
- Open and Transparent: It’s a nonprofit organization supported by various tech companies and aims to promote a secure and privacy-respecting internet.
Let’s Encrypt has played a significant role in increasing HTTPS adoption worldwide, making secure connections a standard for websites of all sizes.
Generate the Certificate
Open a Terminal and run the following command. The DNS entry used has to be a valid DNS record that resolves to the public IP of the router.
certificate enable-ssl-certificate dns=a285895a08d6ff0f.sn.mynetname.net
If you don’t have a valid DNS Domain to use then you can use the MikroTik inbuilt DDNS service (IP > Cloud) and the DNS Name from this. (NB If using a CHR instance a valid P license is required to use DDNS)
View this article about deploying a CHR in AWS which outlines CHR licensing
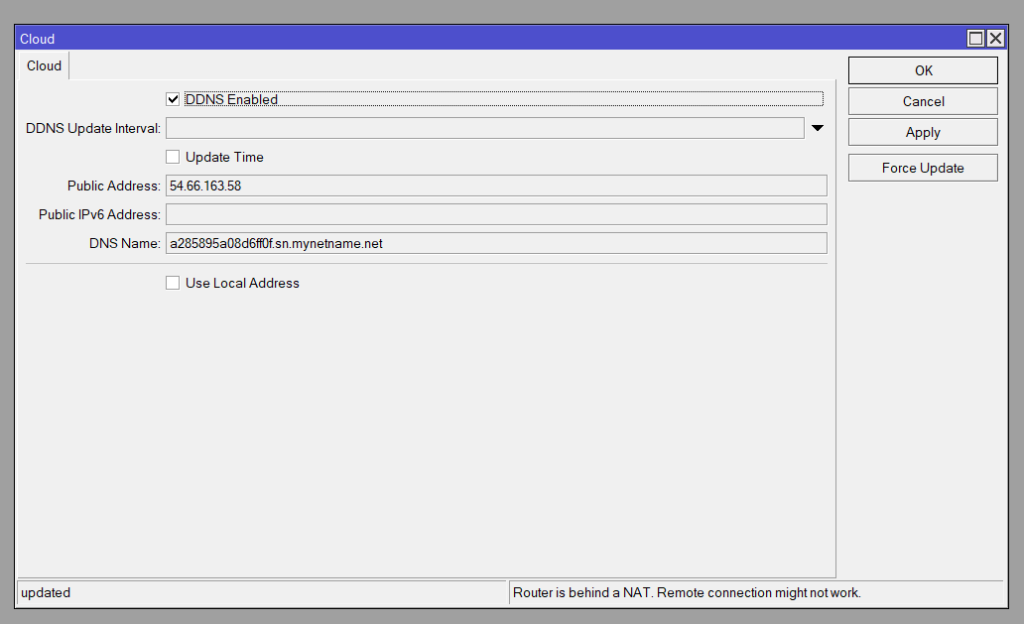
Make sure the MikroTik has inbound (and outbound) access to HTTP/S. Once complete the progress will show [succes] ssl certificate updated.

Confirm the certificate under System > Certificates

Testing
To test, go to IP > Services and enable the www-ssl service (disabled by default) and select the newly aquired SSL cert under Certificate


Open a web browser and enter the DNS name using HTTPS://

The RouterOS Webfig interface should load without any SSL warning. You can confirm the certificate via certificate in the browser window


Automate Renewal
As you can observe from the expiry date and the days valid under the Certificates menu, the license is only vlaid for 89 days. To renew we simply repeat the steps to generate the cert in the first instance so we can automate this using a Scheduler task.
Open System > Scheduler and add new, the set the interval to 88d 00:00:00 (Days Hours:Minutes:Seconds). Then in the On Event add the same command to generate the cert.


Excellent tutorials and website, well done! I’ll be stucked here for a while now 🙂
Hi,
I met with this error.
[admin@U] > certificate enable-ssl-certificate dns=9*******6a.sn.myne
tname.net
progress: [error] http challenge validation failed, please make sure www
service is enabled and your device is accessible by letsencrypt.org
servers
I had enabled IP -> Services -> www
What steps am I missing?
Hi,
You’ll need to make sure TCP 80 & 443 are allowed on the input chain of your firewall.
In my video about MikroTik Hopspot deployment I have this in more detail: https://youtu.be/hsUl0eJO_7E and go to section 06:07 – SSL Certification
Also in the article to match:
https://mikrotikmasters.com/mikrotik-hotspot-the-basics/#:~:text=address%20(IP%20%3E%20Address)-,SSL%20Certificate%20(optional),-Now%2C%20this%20part