
MikroTik’s inbuilt Hotspot allows a quick and simple way to provide Wi-Fi and internet connectivity with the control and flexibility required for public spaces such as cafés, hotels, accommodations, festivals, etc.
In this tutorial, we will look at setting up a hotspot on a single router (hAP AX2) and using the built-in user management. There are many more additional features and configurations available, but we will focus on the basics here and look at those more complex setups in other tutorials.
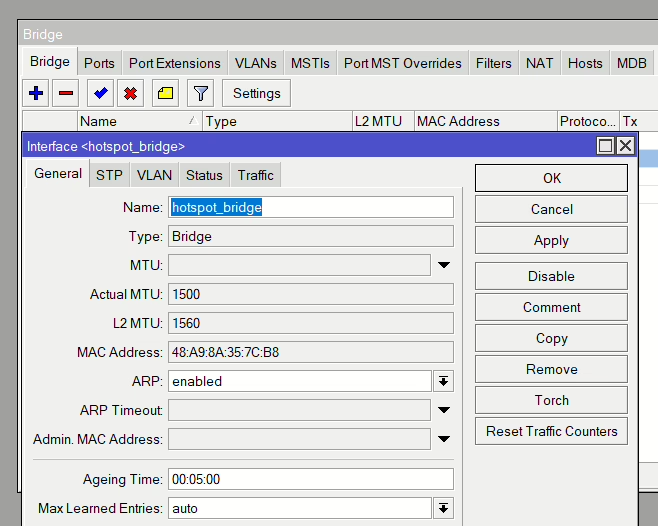
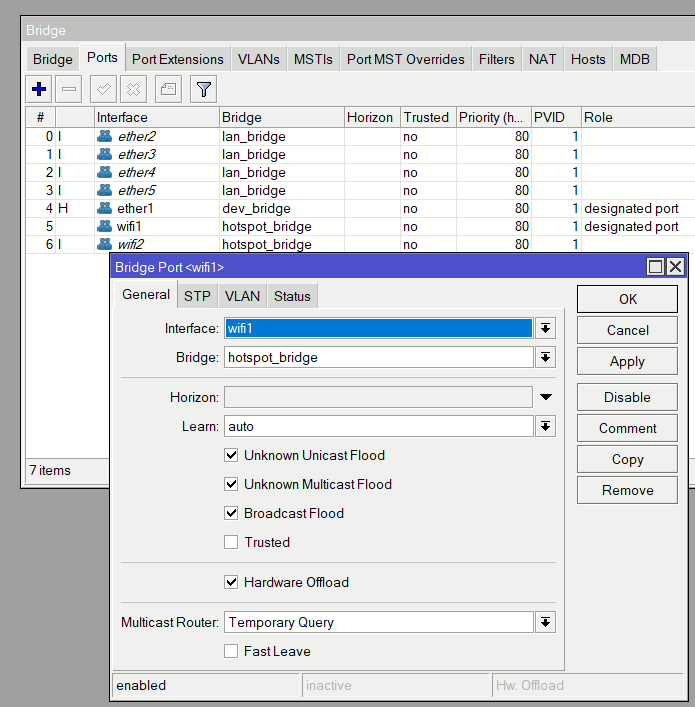
Hotspot Bridge and LAN
First, we create a dedicated bridge for our hotspot users.
Then, add the interfaces that will be connected to the hotspot to that bridge. In our case, we’re creating a Wi-Fi hotspot so we’re adding both our wifi1 &2 interfaces.
Now we need to give our bridge an IP address (IP > Address)

SSL Certificate (optional)
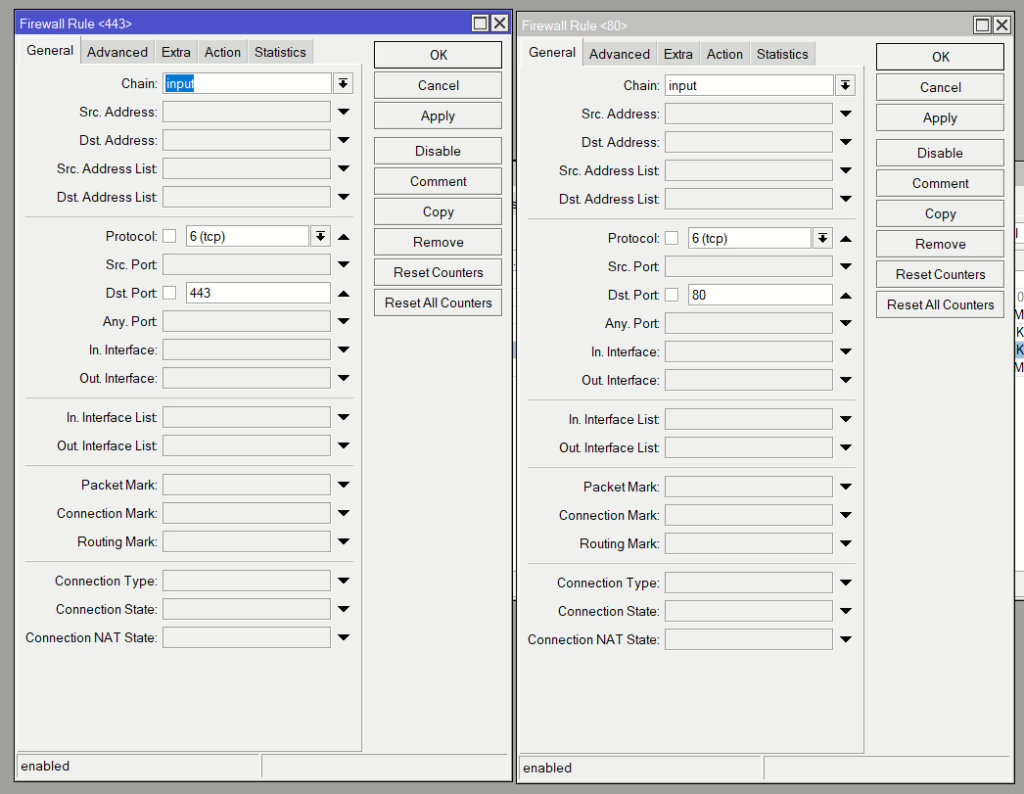
Now, this part is optional and has a few caveats. Firstly, your MikroTik needs to be publicly internet facing so not CGNAT or 4G/5G (basically where your device doesn’t receive a public routable IP address). If it does, however sit behind another router, then you can port forward ports 80 and 443.
The second part is that you will need your own public domain name, i.e mikrotikmasters.com, or you can use MikroTik’s built-in DDNS (IP > Cloud) and use the DDNS Name. In my example, I will generate and install a public SSL cert from Let’s Encrypt using a subdomain I added to my main domain: hotspot.mikrotikmasters.com.
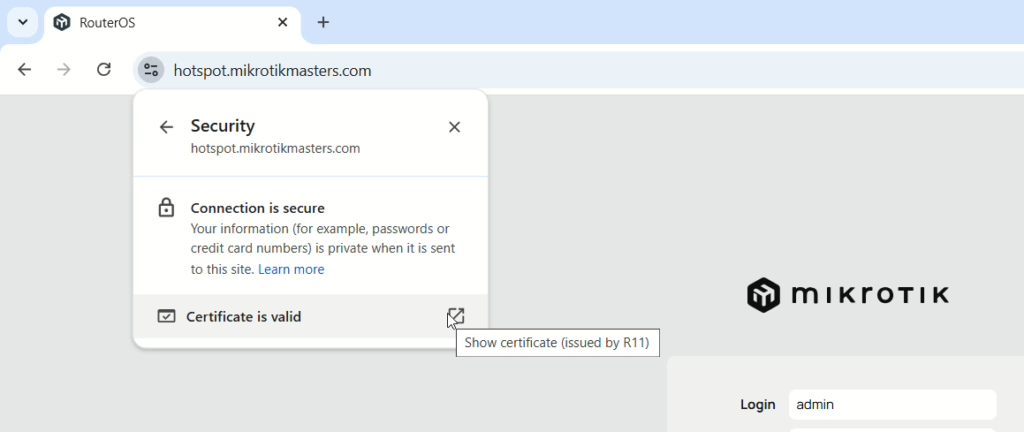
This all means that when the clients connect to the hotspot, the data over the login screen will not only be encrypted (rather than using unencrypted HTTP/80) but will mean the user won’t see a certificate warning error, which can be a red flag for users, especially in public venues. When we download the certificate, it will verify that the IP resolved by the domain name matches, hence the need for public facing HTTP&HTTPS. We can then use that same domain and cert inside our network.
Firstly, add the relevant firewall filter rules on the input chain to allow 443 and 80 (TCP) and set the Action to accept.
Now open a terminal and type
/certificate enable-ssl-certificate dns-name=<your dns name>
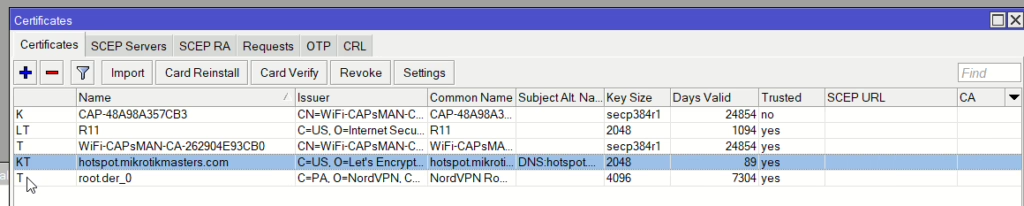
Then once successful you will see it in your certificate menu (System > Certificates)
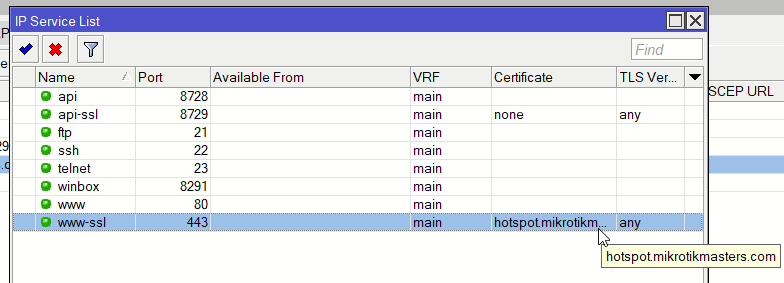
To test, open up IP > Services and enable www-ssl and the certificate should already be selected. Then load the domain in your browser and you should see Webfig login with a valid cert.
Hotspot Setup
Hotspot Setup Wizard
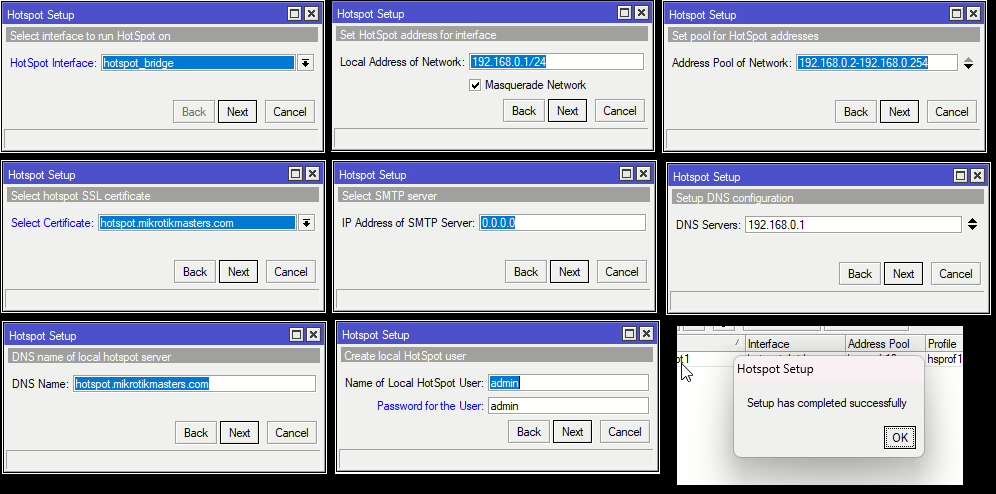
Now open up IP > Hotspot and click Hotspot Setup

Then follow the setup and use the following options:
| HotSpot Interface | hotspot_bridge | Bridge created for the HotSpot |
| Local Address of the Network | 192.168.0.1/24 | IP address of the HotSpot Bridge |
| Address Pool of Network: | 192.168.0.2-192.168.0.254 | Adjust to suitable scope |
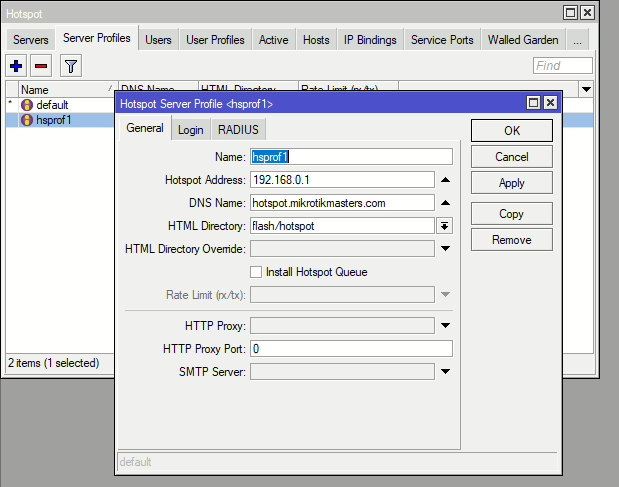
| Select Certificate: | hotpspot.mikrotikmasters.com | The Let’s Encrypt SSL cert |
| IP Address of SMTP Server: | 0.0.0.0 | Leave Default |
| DNS Servers: | 192.168.0.1 | Use the MT as the DNS server |
| DNS Name: | hotpspot.mikrotikmasters.com | Match the cert name |
| Name of Local Hotspot User: | admin / <test password> | Use something more secure |
Configured Server:
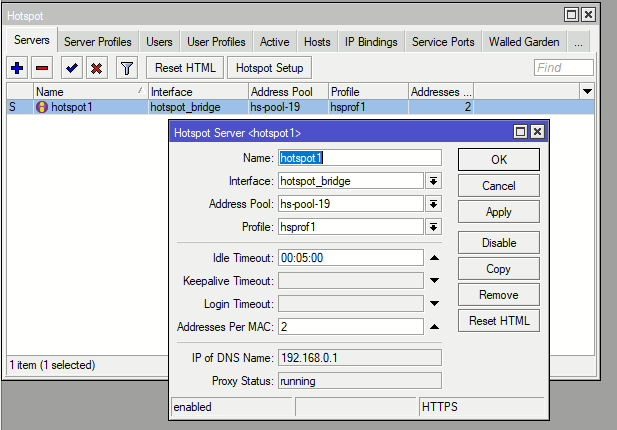
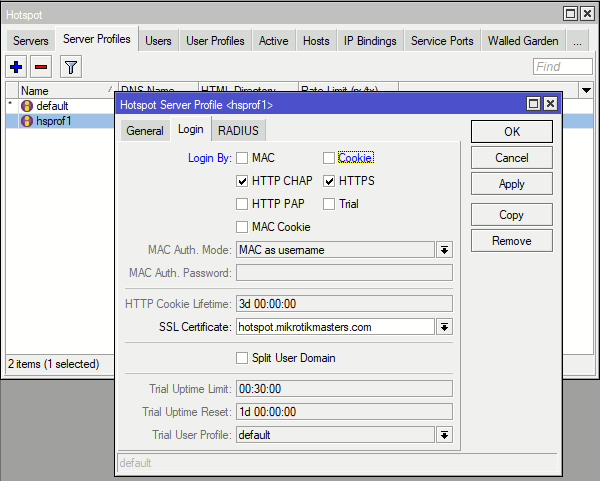
Under Server Profiles, on the newly generated profile, under Login uncheck Cookie
Additional Users
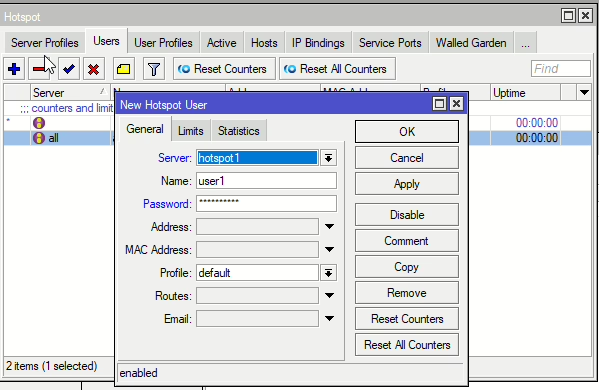
To add new users, go to Hotspot > Users and select the hotspot1 server and set a username & password.
Connecting/Testing
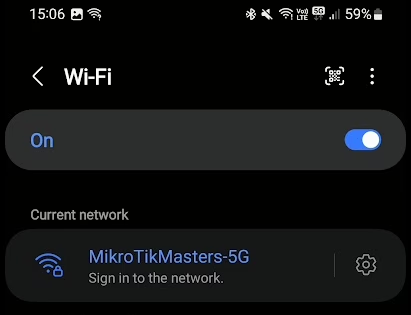
We have completed the minimal setup to use our MikroTik Hotspot. We can now view the SSID in our available connections and connect to it. If the Login screen doesn’t appear, it will prompt us to sign in.
We can use those credentials we created during the hotspot setup wizard (admin / admin) or add a new user as shown above.


can you make a post on how to setup hotspot using freeradius please
Hi, sure I had intended to do it when I made this video but was migrating my site at the time.
https://www.youtube.com/watch?v=g0O2lwRFZb4
I also have a video and guide for installing FreeRADIUS on Ubuntu if that is of use:
https://mikrotikmasters.com/installing-freeradius-and-mysql-db-on-ubuntu/
But I’ll try and get a guide up soon for Hotspot + Radius