This step-by-step guide walks you through configuring a MikroTik hEX router as a CAPsMAN controller, using two cAP ax access points connected through a VLAN-capable switch. Ideal for scalable, segmented Wi-Fi deployments.
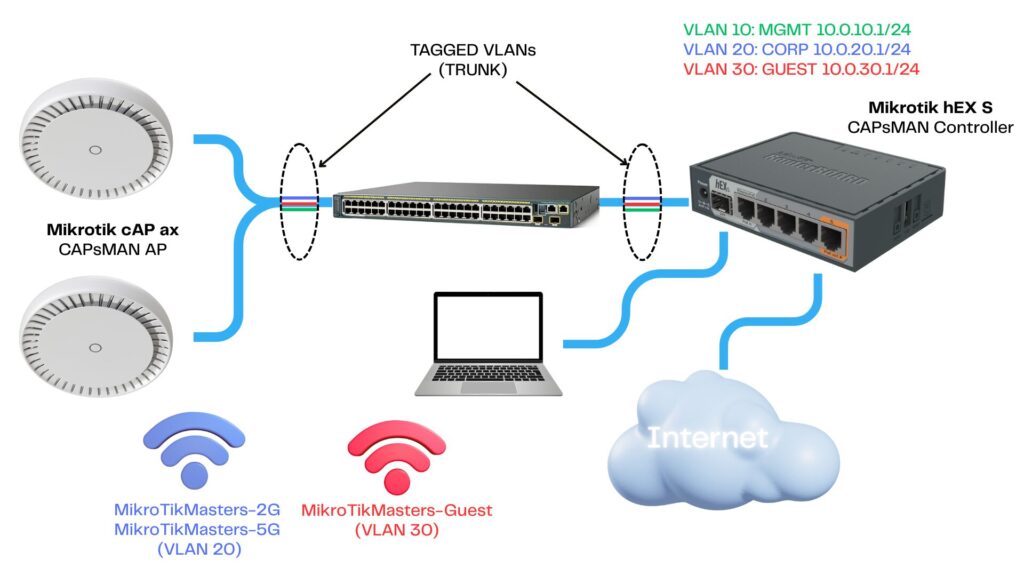
✨ Network Topology Overview
- hEX Router: Acts as VLAN gateway and CAPsMAN controller
- Switch: Cisco 2960 or similar (untagged/trunk port setup)
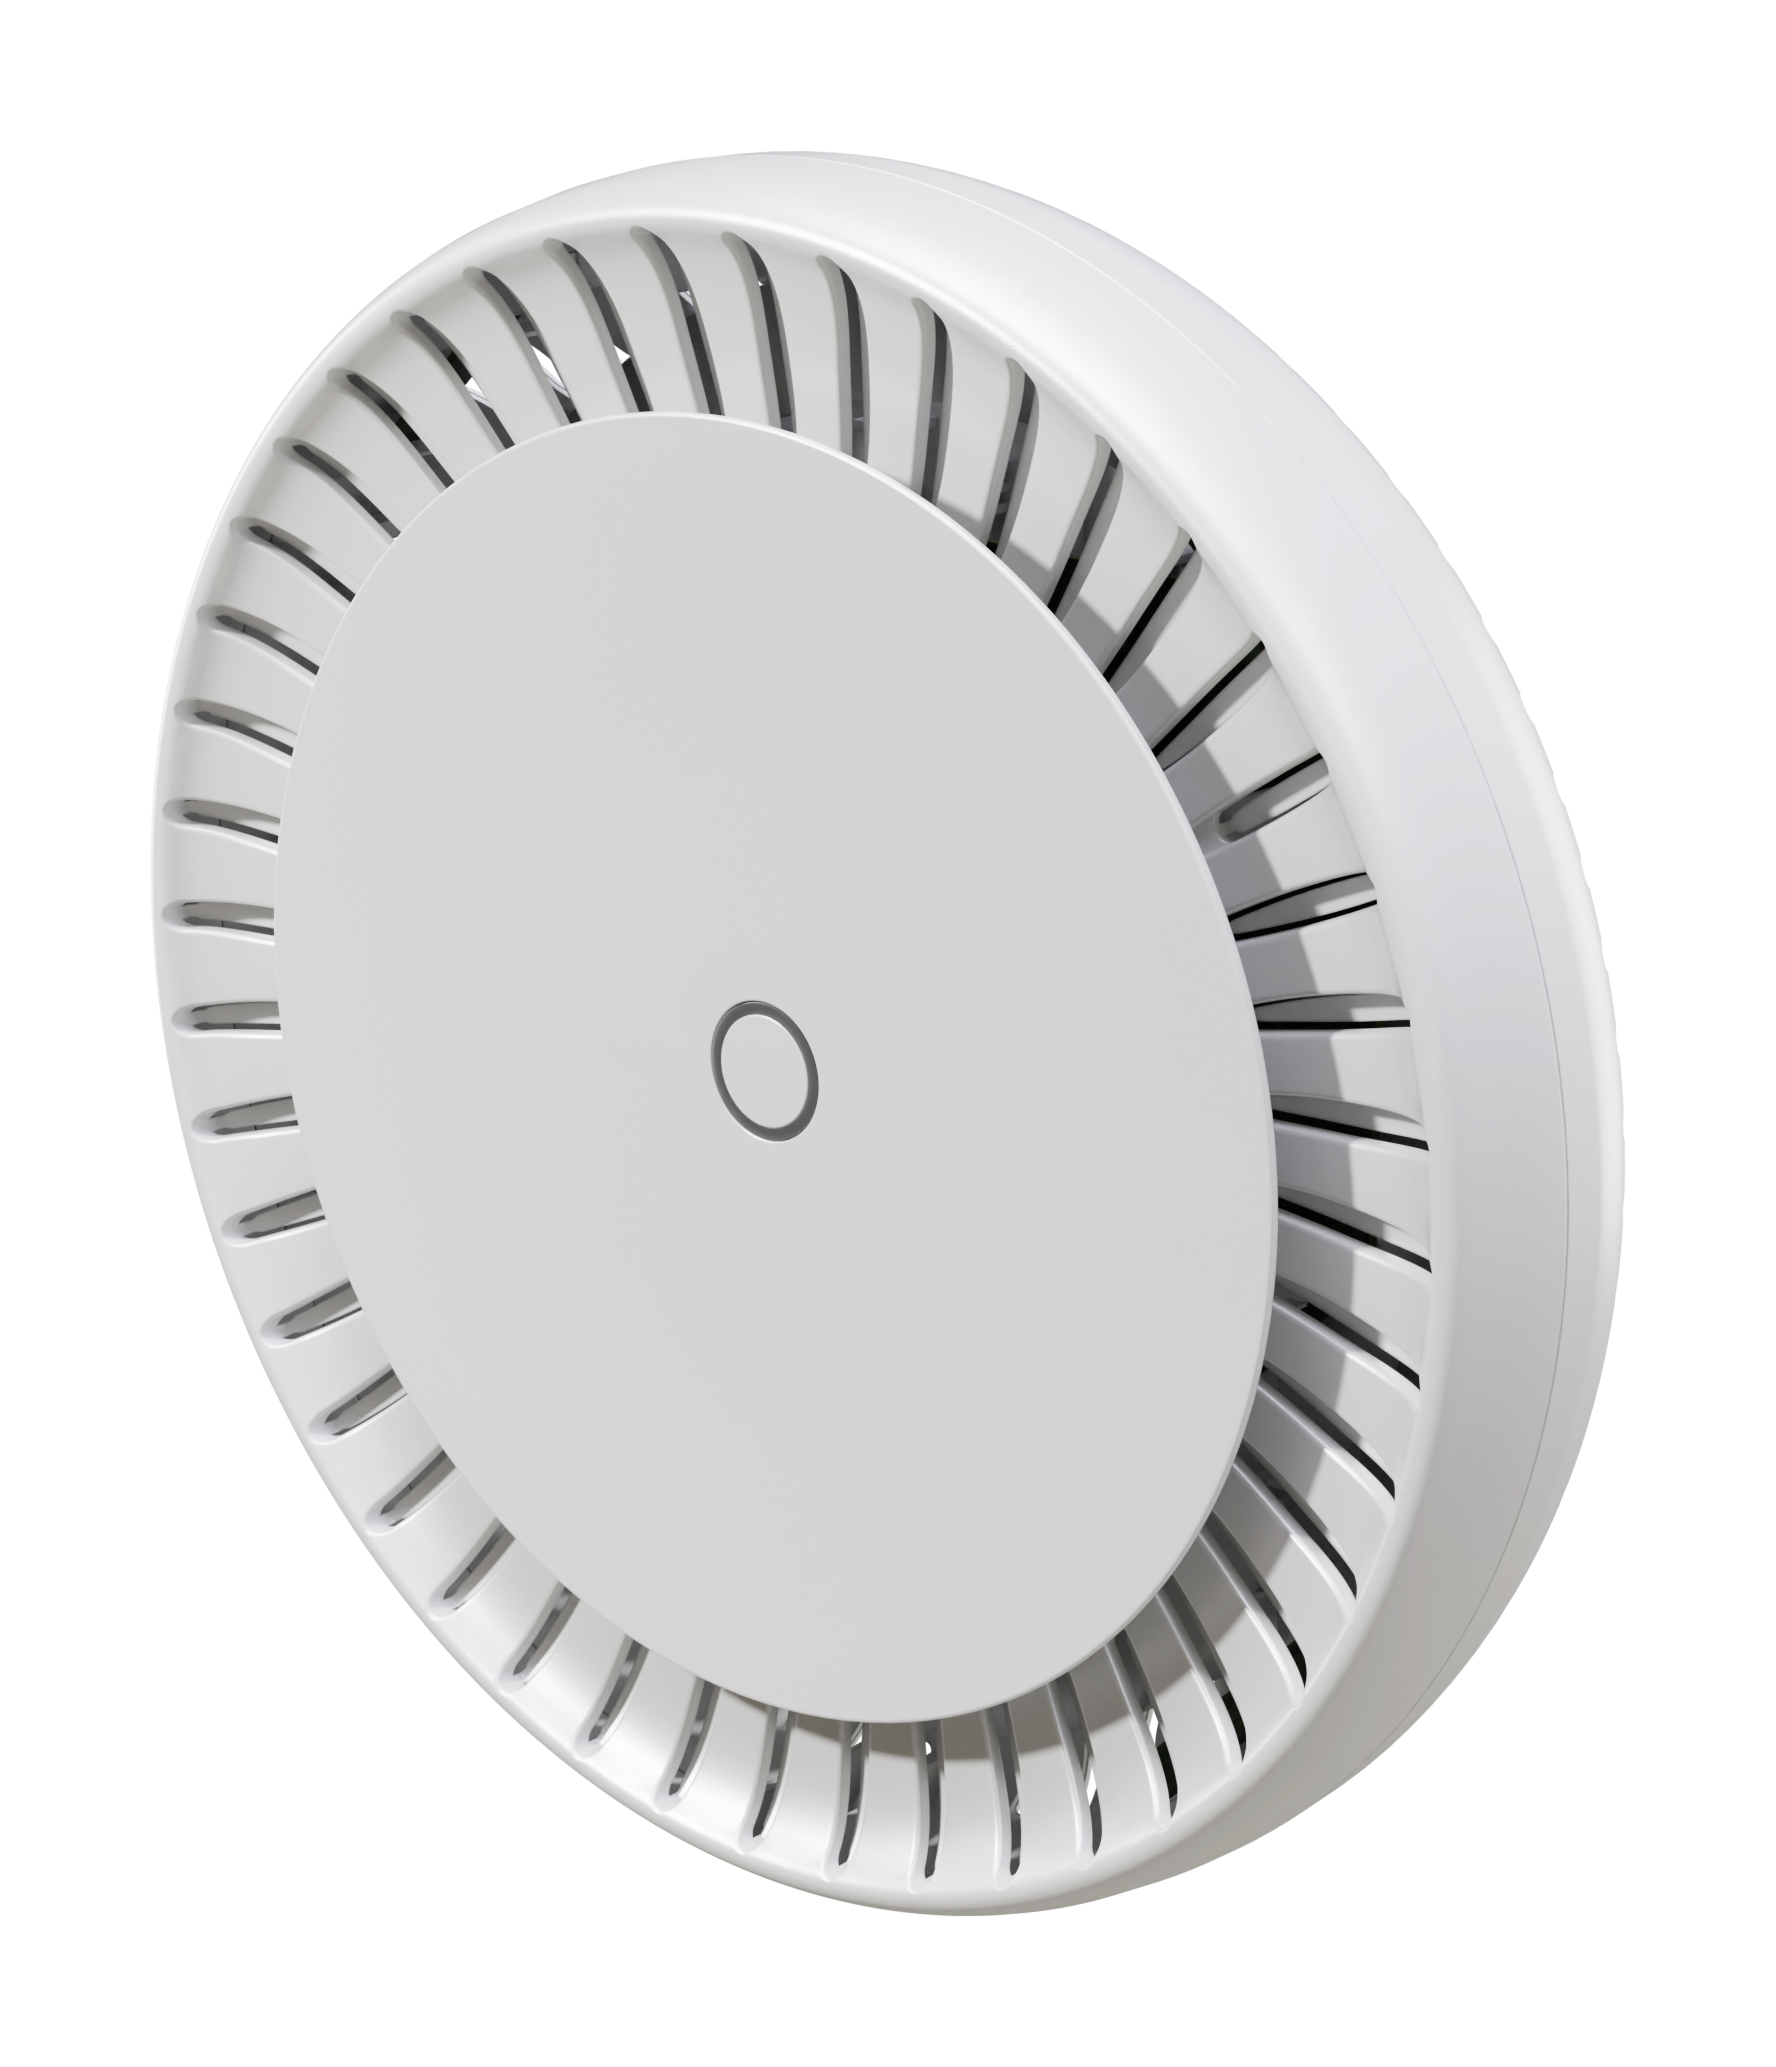
- Access Points: MikroTik cAP ax x2
VLAN Plan:
- VLAN 10 – Management
- VLAN 20 – Corporate WiFi
- VLAN 30 – Guest WiFi
This segmentation helps improve security and organize traffic for different device types or user groups.
⚒️ Step 1: Configure hEX Router (CAPsMAN Controller)
1.1 Label Ethernet Ports
Renaming interfaces makes future configuration and troubleshooting easier.
/interface ethernet
set [find default-name=ether1] name=ether1-wan
set [find default-name=ether2] name=ether2-test
set [find default-name=ether5] name=ether5-switch
1.2 Set Up WAN and NAT
This allows the hEX to connect to the internet and provide NAT to clients.
/ip dhcp-client add interface=ether1-wan disabled=no
/ip firewall nat add chain=srcnat out-interface=ether1-wan action=masquerade
WAN DHCP Client (IP > DHCP Client)

Labelled Interfaces

NAT Rule (IP > Firewall)


🌐 Step 2: VLAN-Aware Bridge
Create a VLAN-aware bridge and define interfaces for each VLAN.
/interface bridge add name=LAN-bridge vlan-filtering=no

/interface vlan
add name=vlan10-mgmt vlan-id=10 interface=LAN-bridge
add name=vlan20-corp vlan-id=20 interface=LAN-bridge
add name=vlan30-guest vlan-id=30 interface=LAN-bridge

/ip address
add address=10.10.10.1/24 interface=vlan10::MGMT
add address=10.10.20.1/24 interface=vlan20::CORP
add address=10.10.30.1/24 interface=vlan30::GUEST
Bridge

VLAN Interfaces (Interfaces > VLAN)

🚚 Step 3: Setup DHCP for Each VLAN
Set up DHCP pools so devices in each VLAN can receive IP addresses automatically.
/ip pool
add name=pool-mgmt ranges=10.10.10.10-10.10.10.50
add name=pool-corp ranges=10.10.20.10-10.10.20.100
add name=pool-guest ranges=10.10.30.10-10.10.30.150

/ip dhcp-server
add address-pool=pool-mgmt interface=vlan10::MGMT name=dhcp-mgmt
add address-pool=pool-corp interface=vlan20::CORP name=dhcp-corp
add address-pool=pool-guest interface=vlan30::GUEST name=dhcp-guest

/ip dhcp-server network
add address=10.10.10.0/24 gateway=10.10.10.1 dns-server=10.10.10.1
add address=10.10.20.0/24 gateway=10.10.20.1 dns-server=10.10.20.1
add address=10.10.30.0/24 gateway=10.10.30.1 dns-server=10.10.30.1

/ip dns set allow-remote-requests=yes
🎯 Step 4: Bridge VLAN Tagging
Define which VLANs are tagged or untagged per interface. Once VLANs are setup enable VLAN filtering on the Bridge
/interface bridge port
add interface=ether2-test bridge=LAN-bridge pvid=10
add interface=ether5-switch bridge=LAN-bridge

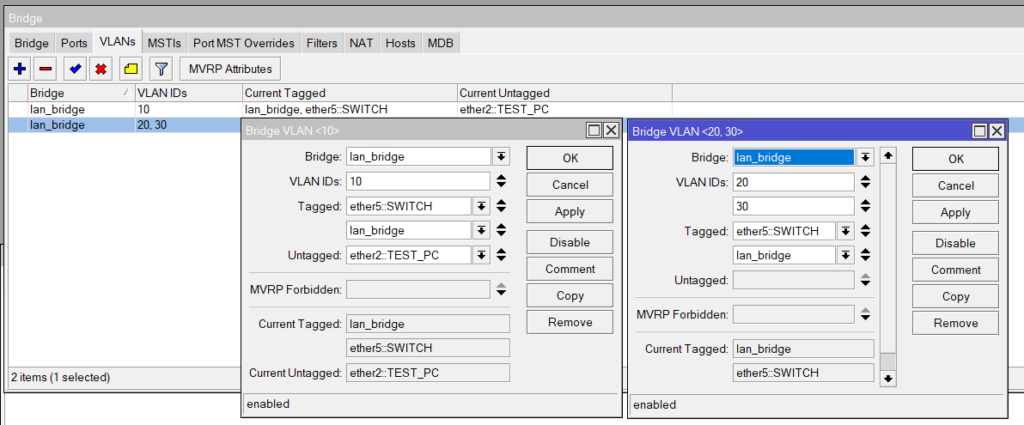
/interface bridge vlan
add bridge=LAN-bridge vlan-ids=10 tagged=LAN-bridge,ether5-switch untagged=ether2-test
add bridge=LAN-bridge vlan-ids=20 tagged=LAN-bridge,ether5-switch
add bridge=LAN-bridge vlan-ids=30 tagged=LAN-bridge,ether5-switch

/interface bridge set LAN-bridge vlan-filtering=yes frame-types=admit-only-vlan-tagged
Port VLANs (Bridge > Ports)
Add a port to the Bridge and for Untagged (Access Ports) set the PVID and for Tagged (Trunk) ports leave the PVID and change the Frame Types to only VLAN tagged

Bridge Tags (Bridge > VLAN)
VLAN tags can be added to a single line however the Tagged and Untagged options must be the same for all VLANs. For example, VLAN 10 is Tagged on switchport but untagged on ether2 so this requires a different config for the other 2 VLANs that are only Tagged on the uplink to the switch.
You must also tag the Bridge in each VLAN config
🌌 Step 5: Configure CAPsMAN Controller
CAPsMAN centralises WiFi config. Define SSIDs, security, VLAN mapping, and provisioning rules. We will use VLAN 20 for Corp SSID and VLAN 30 for Guest. VLAN 10 will be used for CAPsMAN Managment and AP discovery
/interface wifi datapath
add name=corp vlan-id=20 vlan-mode=use-tag
add name=guest vlan-id=30 vlan-mode=use-tag

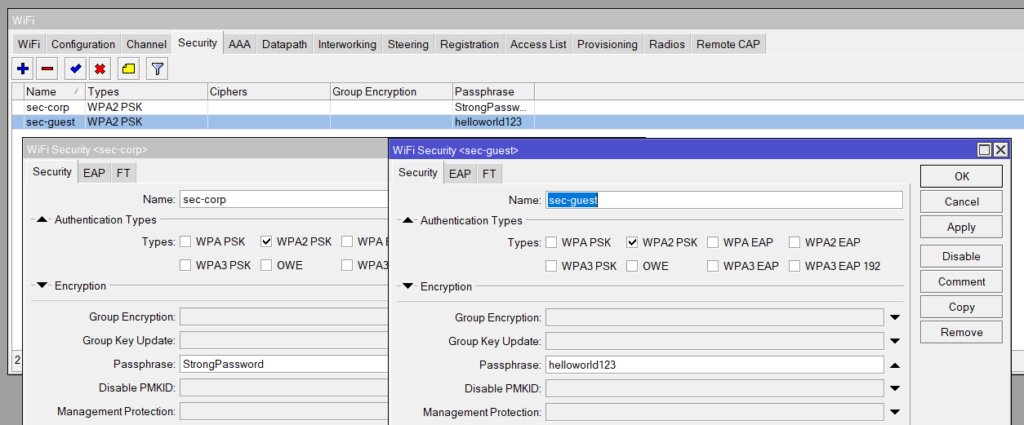
/interface wifi security
add name=corp-sec authentication-types=wpa2-psk passphrase=strongpassword
add name=guest-sec authentication-types=wpa2-psk passphrase=helloworld123

/interface wifi channel
add band=5ghz-ax frequency=5180 name=5GHZ::CH36 width=20mhz
add band=5ghz-ax frequency=5200 name=5GHZ::CH40 width=20mhz
add band=5ghz-ax frequency=5220 name=5GHZ::CH44 width=20mhz
add band=5ghz-ax frequency=5240 name=5GHZ::CH48 width=20mhz
add band=5ghz-ax frequency=5745 name=5GHZ::CH149 width=20mhz
add band=5ghz-ax frequency=5765 name=5GHZ::CH153 width=20mhz
add band=5ghz-ax frequency=5785 name=5GHZ::CH157 width=20mhz
add band=5ghz-ax frequency=5805 name=5GHZ::CH161 width=20mhz
add band=5ghz-ax frequency=5825 name=5GHZ::CH165 width=20mhz
add band=5ghz-ax disabled=no frequency=5180,5200,5220,5240 name=5GHZ::UNII-1 width=20mhz
add band=5ghz-ax disabled=no frequency=5745,5765,5785,5805,5825 name=5GHZ::UNII-3 width=20mhz
add band=5ghz-ax disabled=no frequency=5180,5200,5220,5240,5745,5765,5785,5805,5825 name=5GHZ::NON-DFS width=20mhz
add band=2ghz-ax frequency=2412 name=2GHZ::CH1 width=20mhz
add band=2ghz-ax frequency=2437 name=2GHZ::CH6 width=20mhz
add band=2ghz-ax frequency=2462 name=2GHZ::CH11 width=20mhz
add band=2ghz-ax disabled=no frequency=2412,2437,2462 name=2GHZ::AUTO width=20mhz

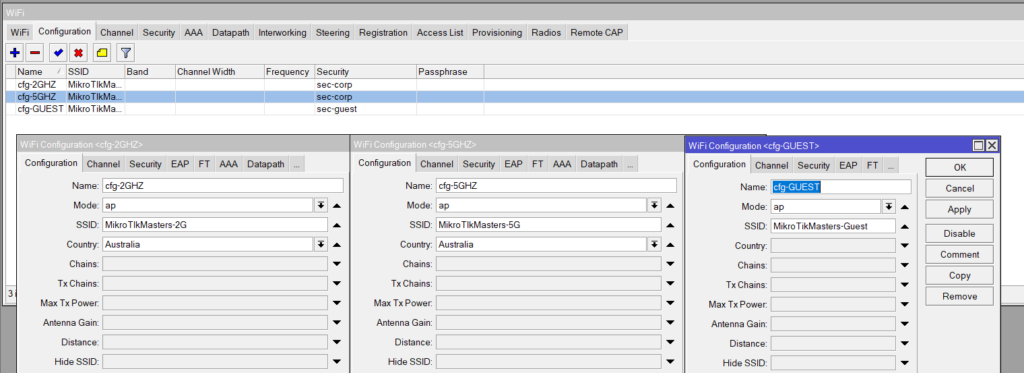
/interface wifi configuration
add name=corp-5g ssid="Corp-WiFi-5G" mode=ap security=corp-sec datapath=corp channel=5GHZ::NON-DFS
add name=corp-2g ssid="Corp-WiFi-2G" mode=ap security=corp-sec datapath=corp channel=2GHZ::AUTO
add name=guest ssid="Guest-WiFi" mode=ap security=guest-sec datapath=guest

/interface wifi provisioning
add action=create-enabled master-configuration=corp-5g slave-configurations=guest supported-bands=5ghz-ax
add action=create-enabled master-configuration=corp-2g slave-configurations=guest supported-bands=2ghz-ax

/interface wifi capsman
set ca-certificate=auto certificate=auto interfaces=vlan10::MGMT package-path="" require-peer-certificate=no upgrade-policy=none
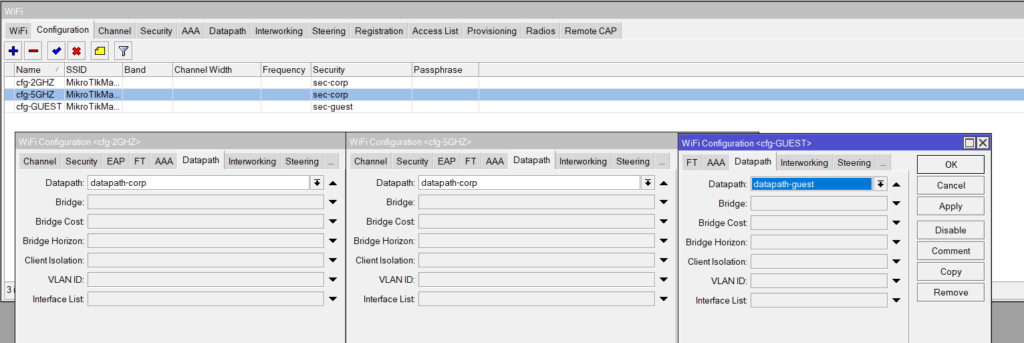
Datapaths

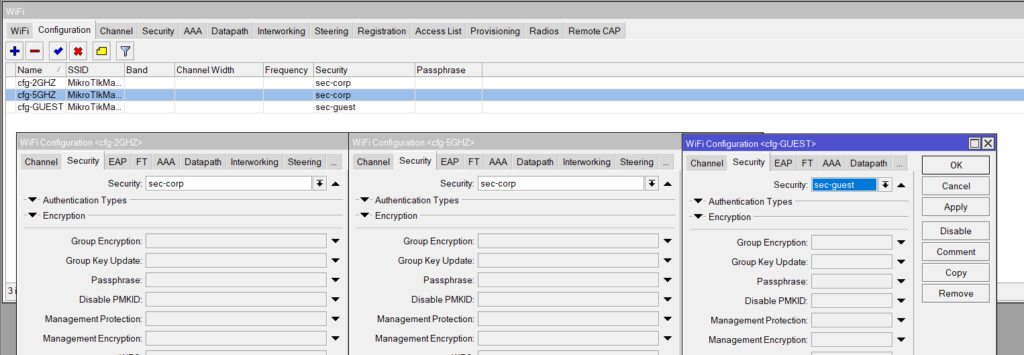
Security
Channel
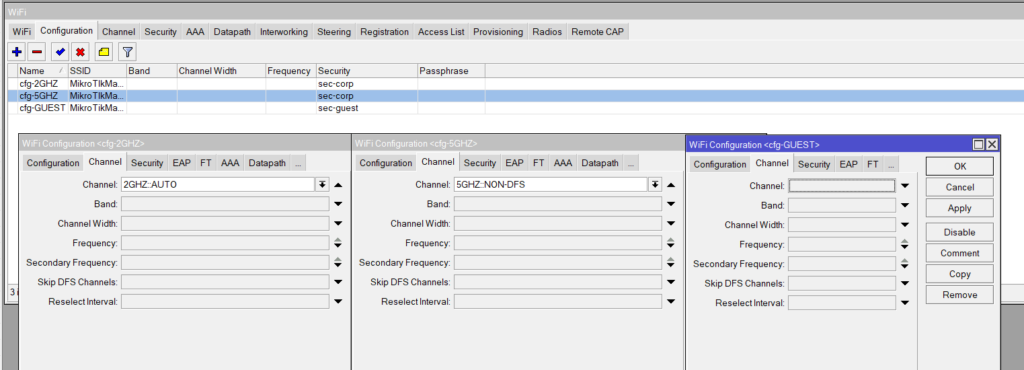
The below Channels are populated by the above config (/interface wifi channel) and is easier to be copied and paste into a terminal rather than configuring each one individually but gives you options for setting individual channels per AP or the range of the recommended usable 2.4Ghz and 5GHz Frequencies.

Configuration Profiles
Channel
Security
Datapah
Enable CAPsMAN Controller Service

🏛️ Step 6: Configure First cAP ax Access Point
Setup bridge and VLAN trunking. Enable CAP mode to join CAPsMAN.
/interface bridge add name=LAN-bridge vlan-filtering=no
/interface vlan add name=vlan10::MGMT vlan-id=10 interface=LAN-bridge
/ip dhcp-client add interface=vlan10::MGMT

/interface bridge port add bridge=LAN-bridge interface=ether1
/interface bridge vlan add bridge=LAN-bridge vlan-ids=10,20,30 tagged=LAN-bridge,ether1
/interface bridge set LAN-bridge vlan-filtering=yes frame-types=admit-only-vlan-tagged

/interface wireless cap
set enabled=yes interfaces=all discovery-interfaces=vlan10-mgmt certificate=request

/interface wifi
set [ find default-name=wifi1 ] configuration.manager=capsman .mode=ap datapath.bridge=lan_bridge disabled=no
set [ find default-name=wifi2 ] configuration.manager=capsman .mode=ap datapath.bridge=lan_bridge disabled=no
Bridge

VLAN Interface

DHCP Client

Port VLAN

VLAN tags

Set WiFi interfaces Manager to CAPsMAN
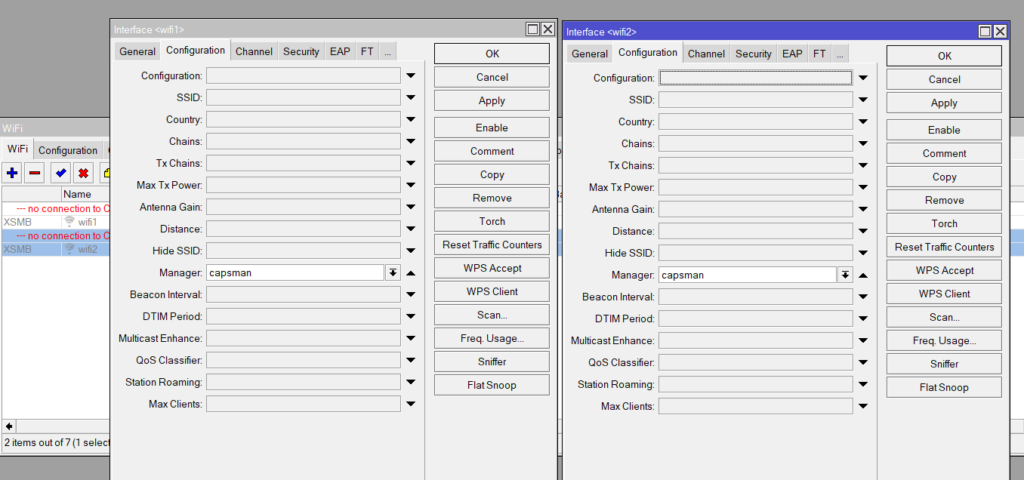
Set Datapath to LAN_bridge
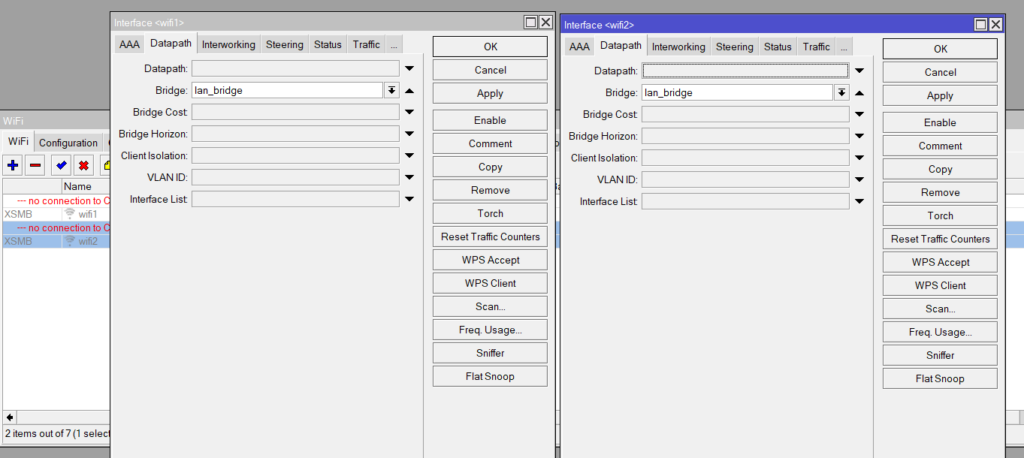
Enable CAPsMAN on AP

🔄 Step 7: Deploy More cAPs (Clone Config)
Export config from one cAP and import on others to speed up deployment.
Export Config to a file then Download it
/export file=cap-configThen Upload it to the new cAP and run a Configuration Reset and run script to config AP (System > Reset Configuration)
/system reset-configuration no-defaults run-after-reset=cap-config.rsc
🔒 Step 8: Secure with Inter-VLAN Firewall Rules
The following firewall rules are set to do the following actions. The Address Lists are used rather than specifying individual IP subnets in each rule.
| Rule No. | From (Address List) | To (Address List) | Action | Exclusions |
| 1 | guest (10.0.30.0/24) | corporate (10.0.20.0/24) | drop | |
| 2 | corporate (10.0.20.0/24) | guest (10.0.30.0/24) | drop | |
| 3 | users (10.0.20.0/24, 10.0.30.0/24) | management (10.0.10.0/24) | established,related connections |
These rules are just examples but it does still allow MGMT access to the other 2 VLANs (which is what the established and related is needed for)
/ip firewall address-list
add address=10.10.10.0/24 list=management
add address=10.10.20.0/24 list=corporate
add address=10.10.30.0/24 list=guest
add address=10.10.20.0/24 list=users
add address=10.10.30.0/24 list=users

/ip firewall filter
add chain=forward src-address-list=guest dst-address-list=corporate action=drop
add chain=forward src-address-list=corporate dst-address-list=guest action=drop
add chain=forward src-address-list=users dst-address-list=management connection-state=!established,!related action=drop
✅ Summary
- Centralized CAPsMAN control
- VLAN-based SSID segmentation
- Easy AP deployment and cloning
- Firewall rules for inter-VLAN security
[PLACEHOLDER: Final CAPsMAN AP list screenshot]

Hi,
nice, I followed guide and succeed. Now I have a tip for next chapter or articl – add another cAPax and use it in station-bridge mode with ethernet access ports and both CAPSMan SSIDs on second(or maybe better wifi1) wifi device. I trien with my 1 week Mikrotik experience and failed for now…
There is no “Remote CAP” > capsman button on my ax2 (7.20.4) and therefore no capsman > enable checkbox. This tutorial is only 6 months old, what has changed?
So as it tuns out….
“The “CAPsMAN” manager enable checkbox was removed in RouterOS 7; you now enable the CAPsMAN manager by using the command line interface (CLI) in the terminal. To do this, go to the terminal and type /caps-man manager set enabled=yes. “