NordVPN is a leading VPN provider. It has many applications and allows secured VPN traffic across mulitple devices. In this guide we’ll provide simple steps to set up a IKEV2 VPN to NordVPN, utilising the feature of being able to choose a VPN server in a remote country.
The below guide is using a previously configured hAP ax2 configured as part of the Home Network Basic Setup Guide.
Step 1: Retrieve NordVPN credentials
This step requires logging into your NordVPN account and assuming you have an active subscription.
If you don’t yet have a subscription click here. NordVPN provides a 30-day money back guarentee which means you can set up your subscription up and if you find it’s not for you they will give you 100% for your money back. They have many plans available and often offer deals. All plans allow up to 10 concurrent devices connected.


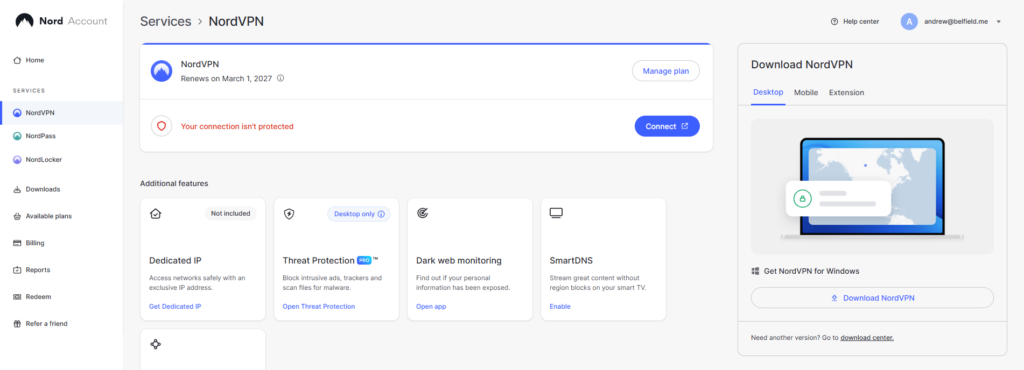
Once logged in go to NordVPN on the lefthand menu
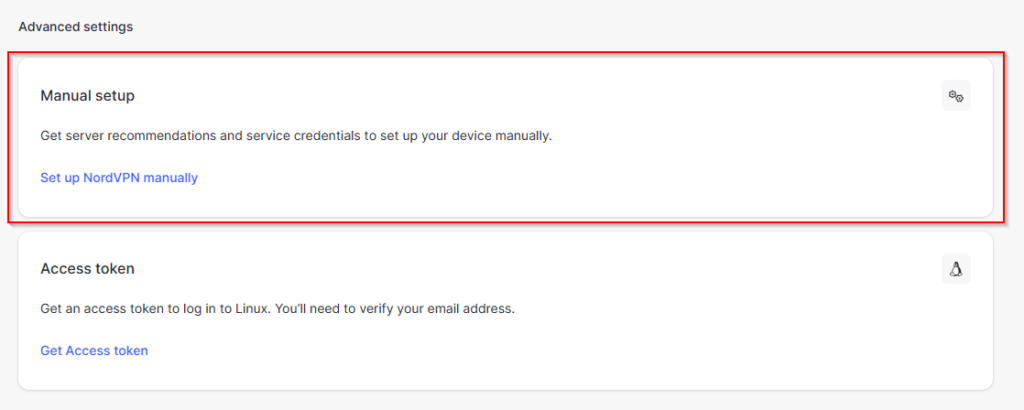
Scroll down under Advanced settings and click on Set up NordVPN manually
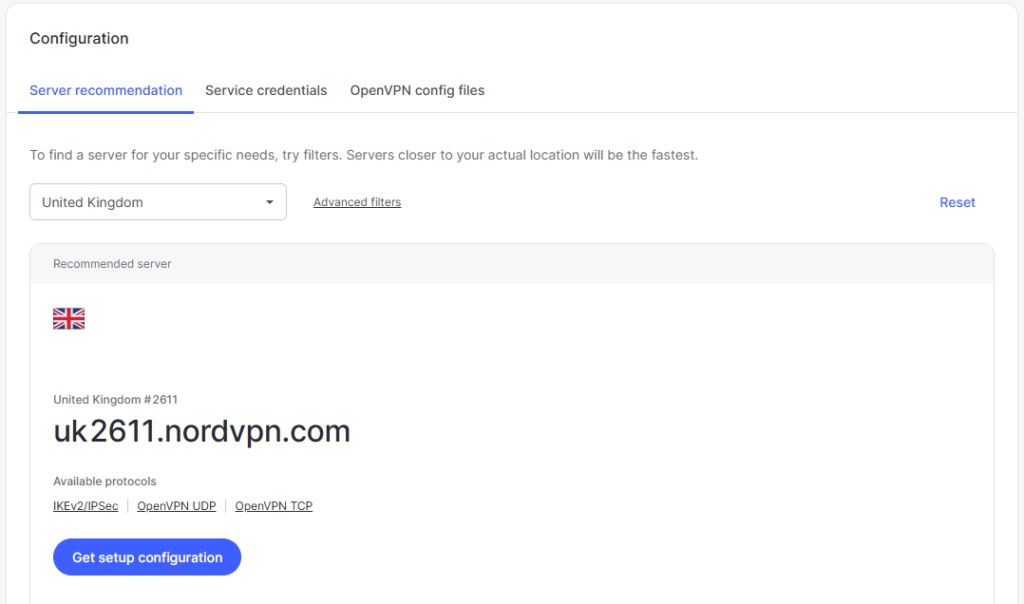
Now select location you wish to connect to (if outside of your home country). For this tutorial we will be connecting to the UK (from Australia), so we select United Kingdom. Now click Get setup configuration
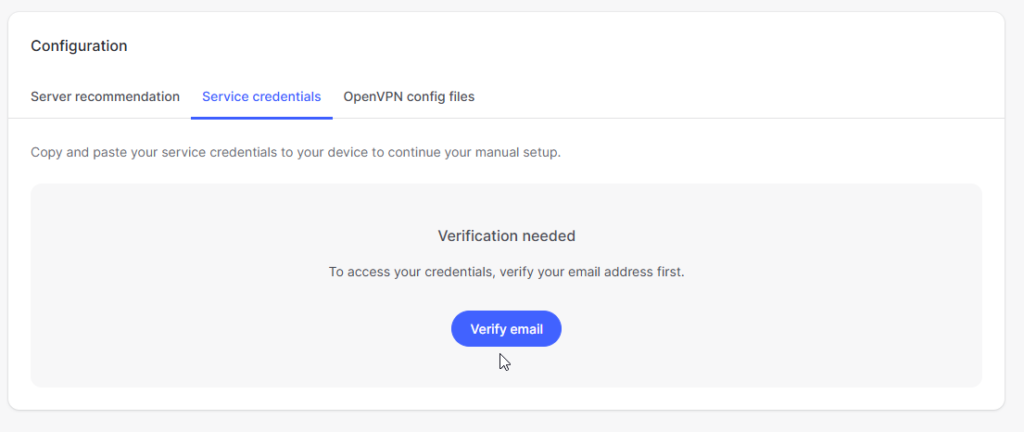
On the next window, click service credentials on the bottom

Now you need to verify your email before viewing the credentials. Click the Verify email buttom, check your emails and input the 6 digit code provided on the next screen.
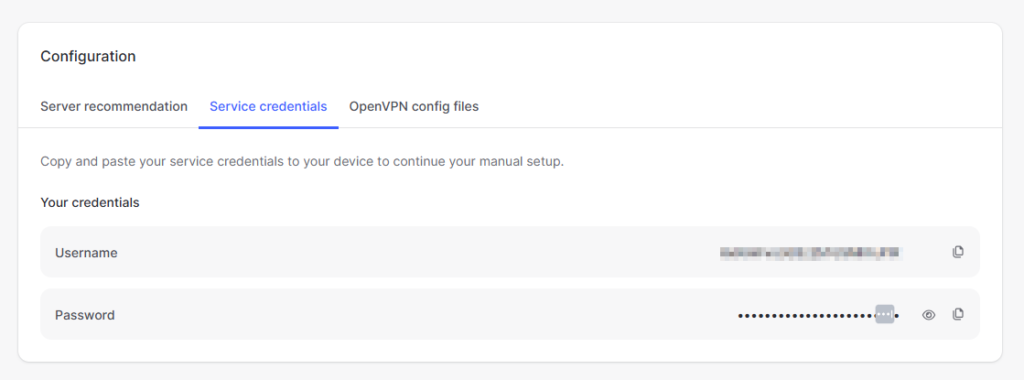
Once verified you’ll see your Username and Password. Keep these ready for the next steps.
Step 2: MikroTik Certification Installation
Firstly we need to download the certificates required from NordVPN on to our MikroTik. This will be done from the Terminal.
/tool fetch url="https://downloads.nordcdn.com/certificates/root.der"
Now import them into the MikroTik Certificates
/certificate import file-name=root.der
Step 3: MikroTik IPSec Configuration
Now onto the IPSec config (IP > IPsec). First create a profile. For this we’ll leave everything default except for the name. We’ll use NordVPN_UK as we may decide to have multiple VPNs to different countries in the future.
/ip ipsec profile
add name=NordVPN_UK
Now the proposal. Again for this just use the defaults except for the name.
/ip ipsec proposal
add name=NordVPN_UK pfs-group=none
Again for the Group just give it a name to link all the other configuration together.
/ip ipsec policy group add name=NordVPN_UK
Now we’re going to create our policy, give it these details for each tab:
| General | Action |
| Src. Address: 0.0.0.0/0 Dst. Address: 0.0.0.0/0 Template: ? Group: NordVPN_UK | Proposal: NordVPN_UK |
/ip ipsec policy add dst-address=0.0.0.0/0 group=NordVPN_UK proposal=NordVPN_UK src-address=0.0.0.0/0 template=yes

Now this part is outside of the IPsec menu, which we could do afterwards if preferred but means going back to edit the mode-config section (in the next step). Go to IP > Firewall > Address List, and create a new list. This is going to be the address/subnet of the traffic we want to route over the VPN. In our case this will just be the Local LAN (192.168.0.0/24) traffic.
/ip firewall address-list
add address=192.168.0.0/24 list=LOCAL
Now back to the IPSec menu (IP > IPsec) we go to Mode Configs tab and add a new one. To retrieve the remote servers details by requesting them we uncheck Responder. When Responder is unchecked we can select the Src. Address List created in the previous step. Again, if we didn’t do the previous step we would need to come back to this config afterwards.
/ip ipsec mode-config
add name=NordVPN_UK responder=no
Next is the peer configuration. For this we need to get the server FQDN from the server location we selected in the first step:

Now use this for the Address part and select our previously created Profile and set the Ex Mode to IKE2.
/ip ipsec peer
add address=uk2611.nordvpn.com exchange-mode=ike2 name=NordVPN_UK profile=NordVPN_UK
Once we have all the core IPSec configuration done the next step is to configure our identity. This will require the Username and Password we located earlier.

Then along with these set the rest of the parameters:
| Peer: NordVPN_UK Auth. Method: eap EAP Methods: MS-CHAPv2 Remote Certificate: none Username: <As per previous steps> Password: <As per previous steps> Policy Template Group: NordVPN_UK Mode Configuration: NordVPN_UK Generate Policy: port strict |
/ip ipsec identity
add auth-method=eap certificate="" eap-methods=eap-mschapv2 generate-policy=port-strict mode-config=NordVPN_UK peer=NordVPN_UK policy-template-group=NordVPN_UK username=<USERNAME FOUND IN STEP 2> password=<USERNAME FOUND IN STEP 2>
Step 4: Testing
Now we have completed all the above steps lets test our conneciton.
First under the Policies tab on the IPsec menu, we can see the NordVPN_UK as having an established state under PH2 State.
From our PC we have connected to the LAN of our router, if we do a Traceroute to a public IP we can see it going from our default gateway of 192.168.0.1 to 194.35.235.146 which is a NordVPN IP. Another sign is the response times go to 300+ms which we would expect routing from Australia to the UK!

We can also compare the above results to those taken when the tunnel is not established:

Lastly we can see from going to WhatIsMyIPAddress.com that our location is now showing as London UK.



Will all traffic, such as PPPoE, pass through the VPN?
Only the traffic from the subnets/IP addresses specified in your LOCAL address list will be routed over the VPN